| Installation | ||||
|---|---|---|---|---|
The first step is to install the server application on your computer so that the Mobile Mouse app can connect to your computer. Please follow the installation instructions below.
|
||||
| Server Setup | ||||
Once you start the app, you will see an icon of a mouse on your menu bar if you are running a Mac, or an icon in your system tray if you are on a PC. To access the server settings, click the menu item on the Mac menu bar, or double click on the icon in the system tray. To quit the server, simply select Quit from the menu items on the Mac, or right click on the icon in the system tray on a PC. |
||||
| Testing the connection | ||||
|
We recommend that before you purchase the app from the app store you run this simple test to make sure that your iPhone can connect to the server properly. To do this, please open Safari on your iPhone or iPod touch and enter the following url:
Once the page loads on Safari, simply enter the IP and port number that are shown on the server and tap the connect button. If you are unable to connect, please refer to the troubleshooting steps below for help. If you are unable to connect using this page, the app won't be able to connect either. |
||||
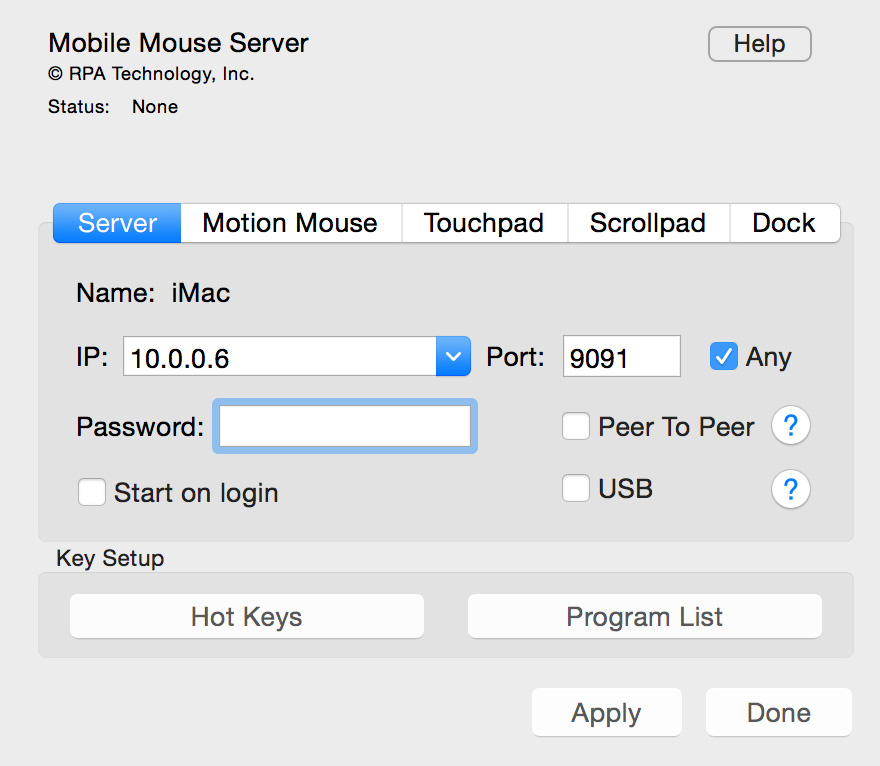
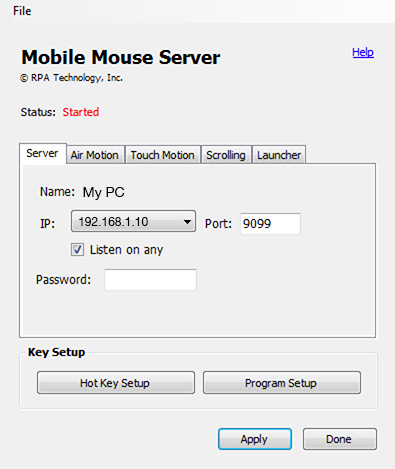
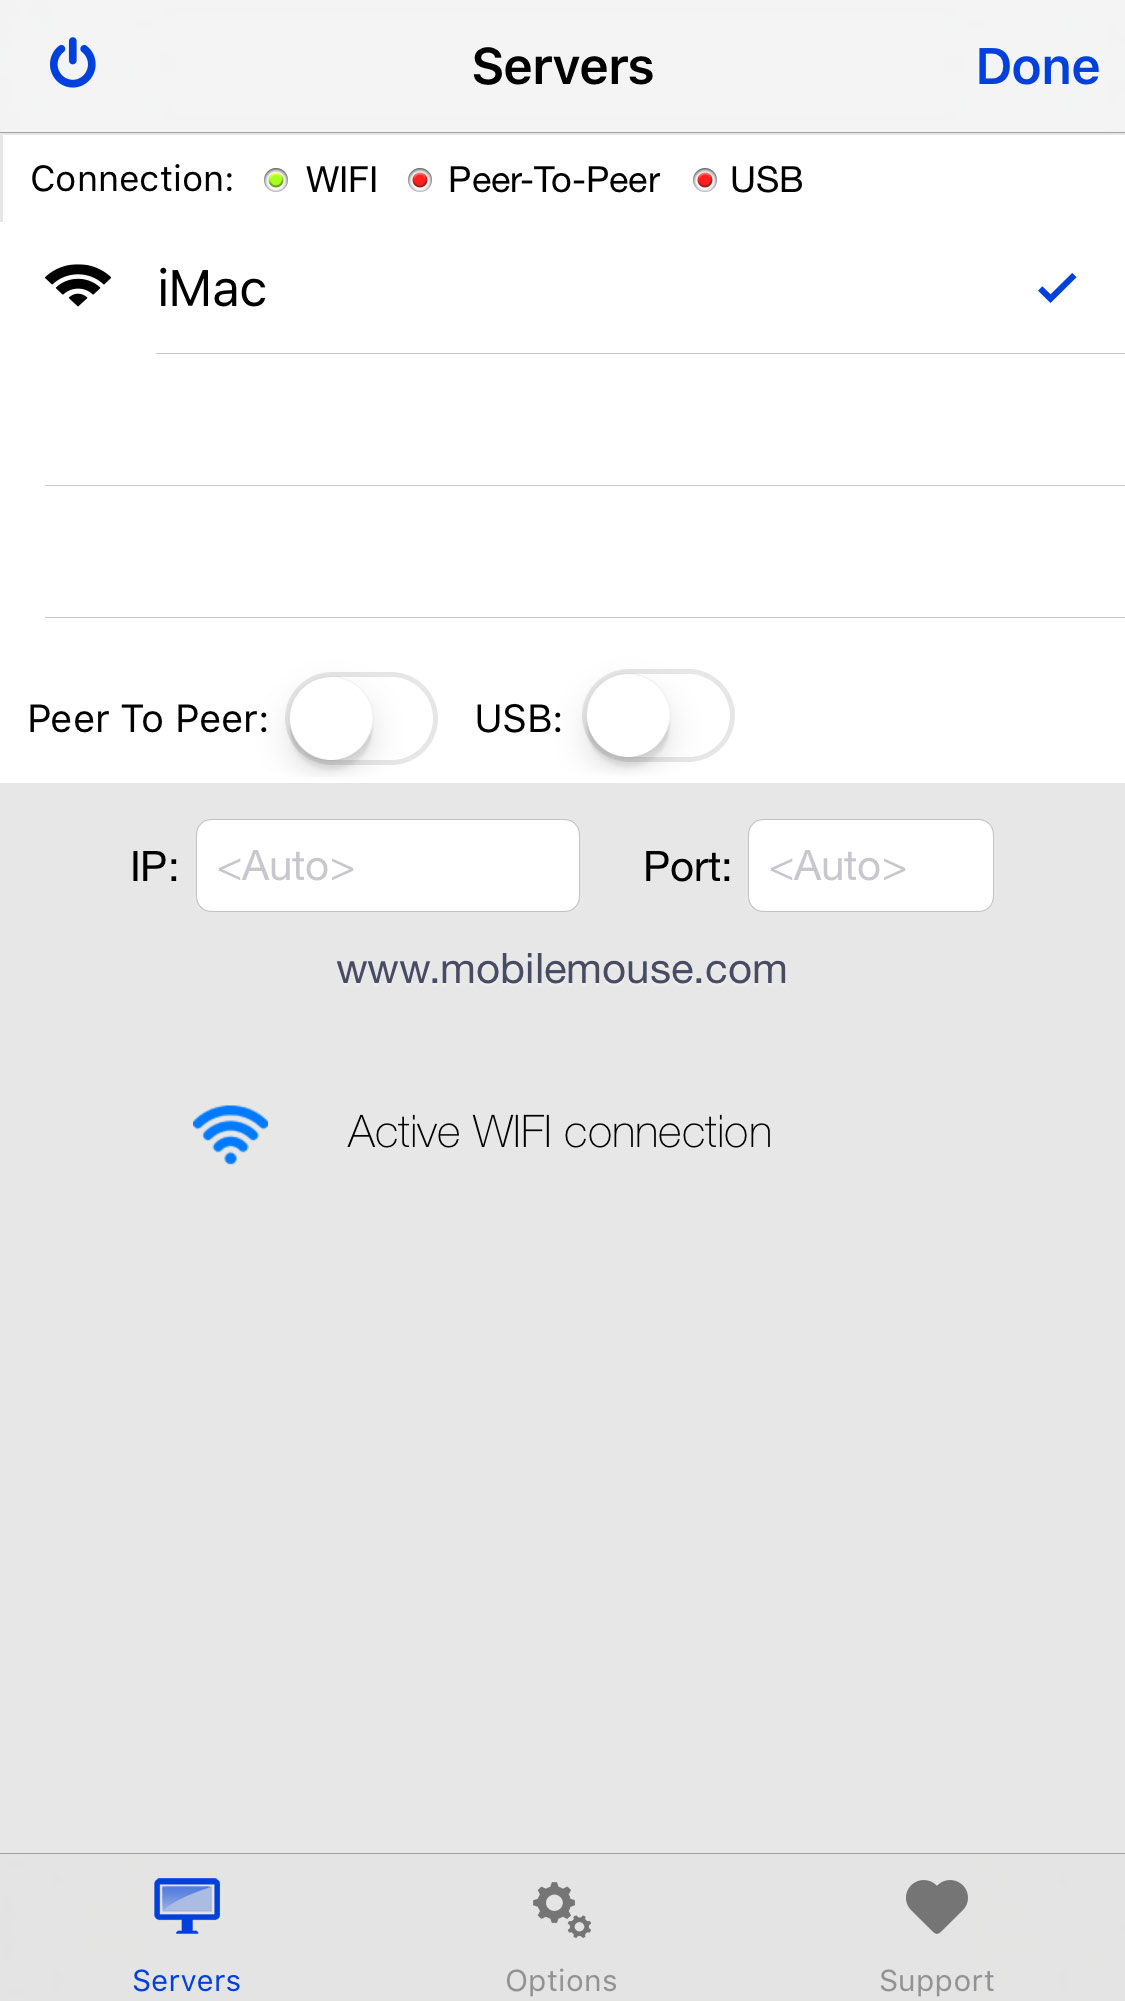
| Server Settings | ||||
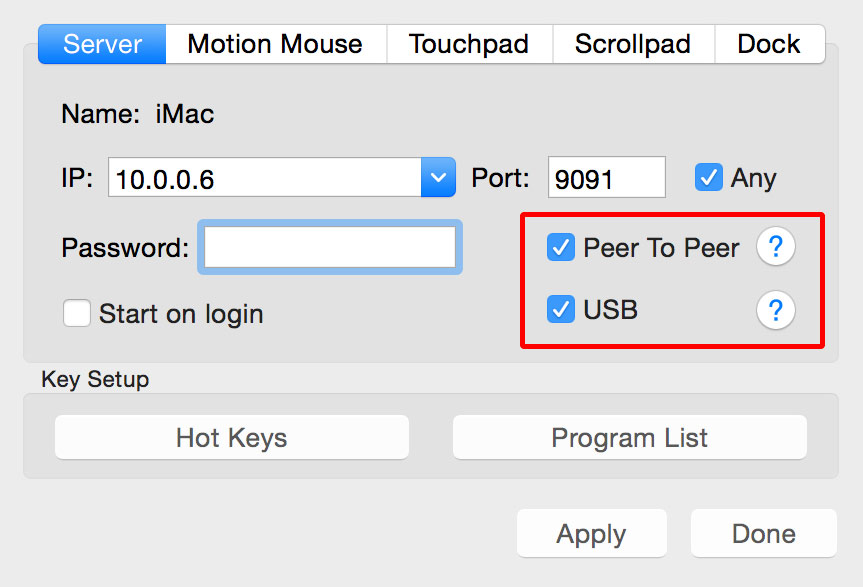
The Server tab contains all the settings related to networking the application.
|
||||
| Program Setup | ||||
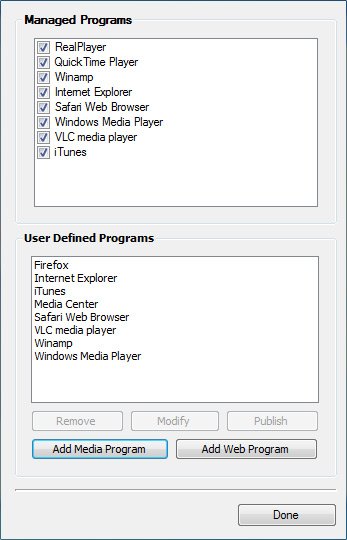 By default, the server is set up for the most common Media and Web applications for your operating system. As we develop new application remotes, they will be automatically downloaded onto your server every day. However, if we are missing the media app you need to control, you can easily create a remote for it through the server. To do this, click the "Program List" button on the main server screen. In the program list, you will see a list of Managed Programs and a list of User Defined Programs. The managed programs are the ones that are downloaded and maintained by us. The user defined programs are the ones that are created and maintained by you. If you want to use your own settings for a program that is on the managed programs list, just uncheck it from this list after you have created your own defninition for that application. 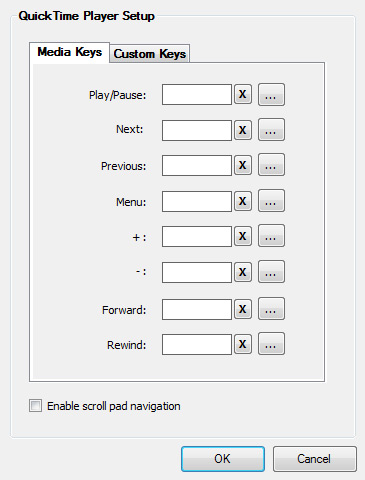 To add a new application, click on the Add button and select the executable. Once you have selected it, you will be presented with all the buttons that are available for that type of program. You can either set a keyboard combination to trigger that action in the program you are controlling, or you can write a script (Applescript on the Mac, VBScript on the PC) to do it. For Media applications, there are 8 additional custom keys that you can name and program to control any additional actions that are not covered by the main buttons. Also, for Media applications, you can check off the "Enable scroll pad navigation" option. When checked off, this option will allow you to use the scroll pad to nagivate programs which use arrow keys to navigate their menus (please see our demo video for examples). |
| Mouse (Touch Pad) | ||||
|---|---|---|---|---|
 The first option for controlling your computer is to use this touch pad. This works the same as the touch pad on your laptop. It can be used in vertical mode with the keyboard showing or hidden, or in landscape mode by rotating your iPhone. The buttons are as follows:
The trackpad responds to all multitouch gestures supported in OS X. To scroll, just use two fingers on the trackpad to scroll in any direction. To perform a right click, single tap with two fingers on the touch pad. |
||||
| Mouse (In-Air) | ||||
 The next option for controlling your computer is to use the in-air mode. In this mode, you will use your hand movement to control your mouse. Just point your device at your computer, then holding down the trigger, move your hand around as if you were using a laser pointer and the mouse will follow. The buttons are as follows:
|
||||
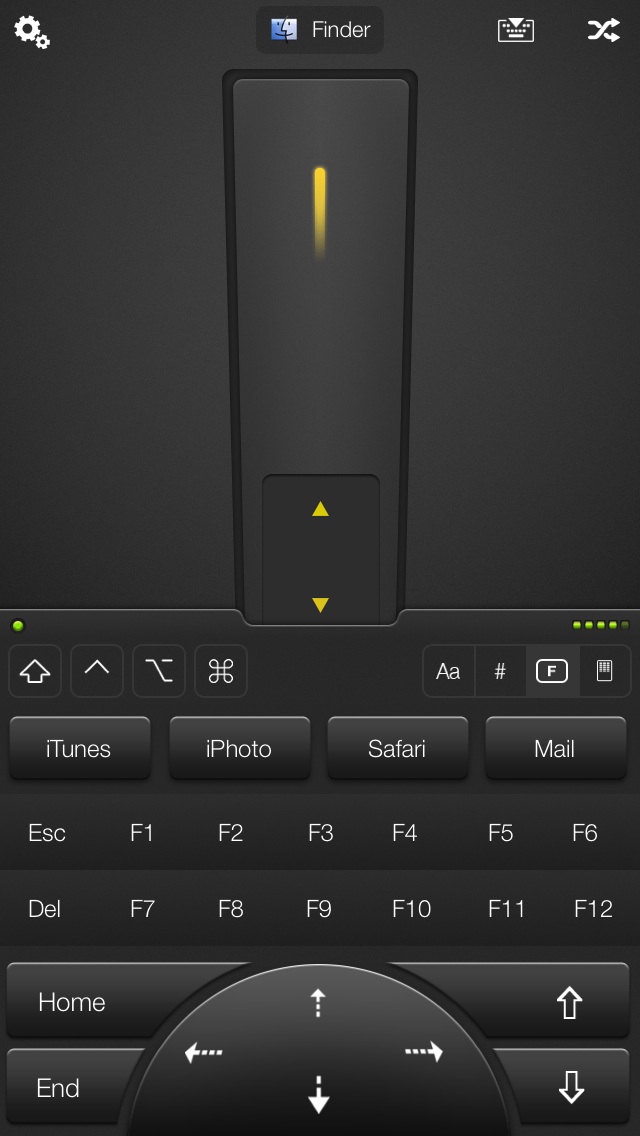
| Keyboard | ||||
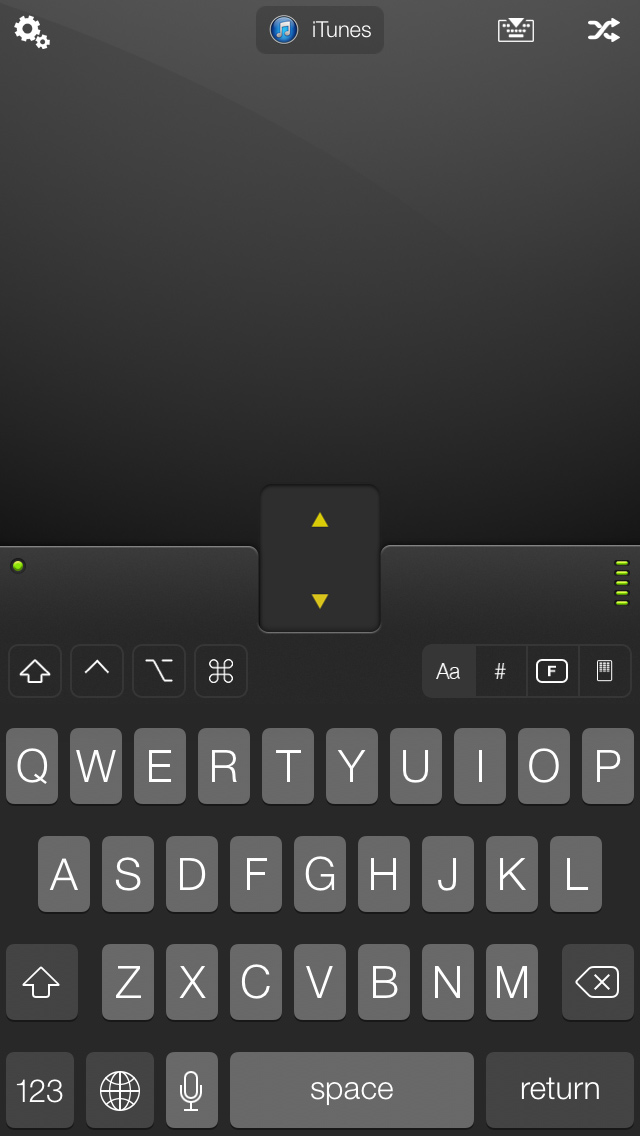
 The keyboard can be used to type on your computer. It can be used in both vertical and horzontal modes. As you type on your iPhone, the letters will be typed in real time on your computer as well as on the screen of the app. You can type a Tab key by double tapping the Return key. Directly above the keyboard are 4 modifier keys. These are the same that you would find on your desktop keyboard. Shift, Ctrl, Win, Alt on the PC and Shift, Ctrl, Option, Command on the Mac. The modifier keys will change to the appropriate keys when you connect to your computer. These can be used to perform keyboard shortcuts, such as creating a new document by hitting Command-N. These keys also work for mouse click, so if you wanted to open a new tab in a web browser you could press the necessary modifier key and click on a link. Modifier clicks don't work in every program though, so your results may vary. To the right of the modifier keys is a minimize button. If you want to hide the keyboard completely in order to have the entire screen as a trackpad, just shake the phone in a downward motion or tap the keyboard icon at the top and it will slide away. To bring it back, just shake your phone in an upward direction or tap the keyboard icon again. |
||||
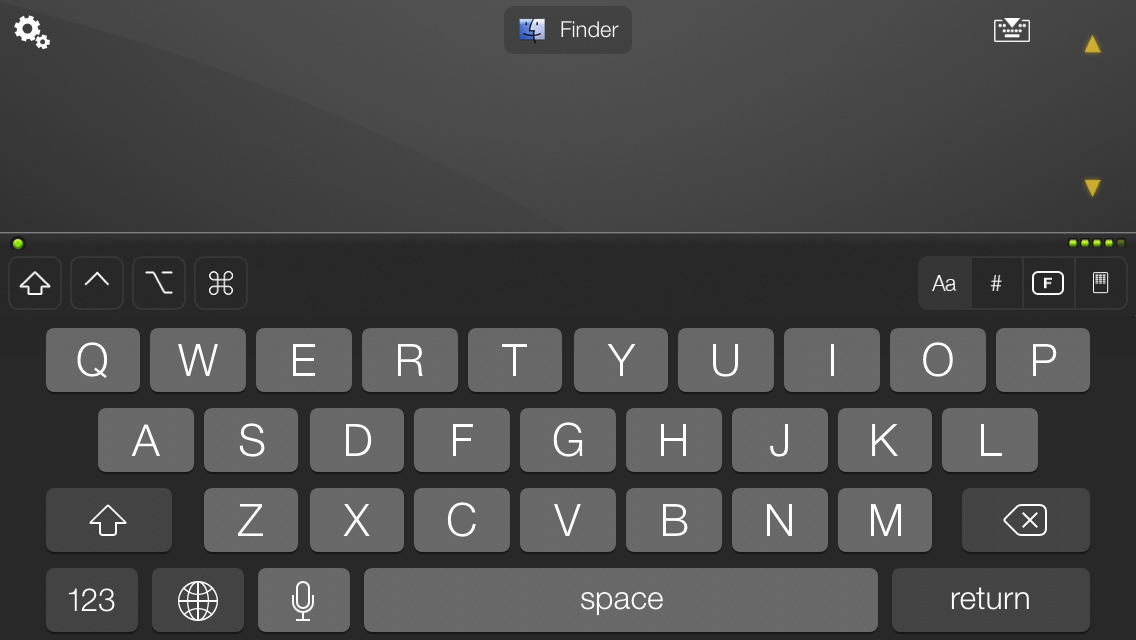
| Application Switcher | ||||

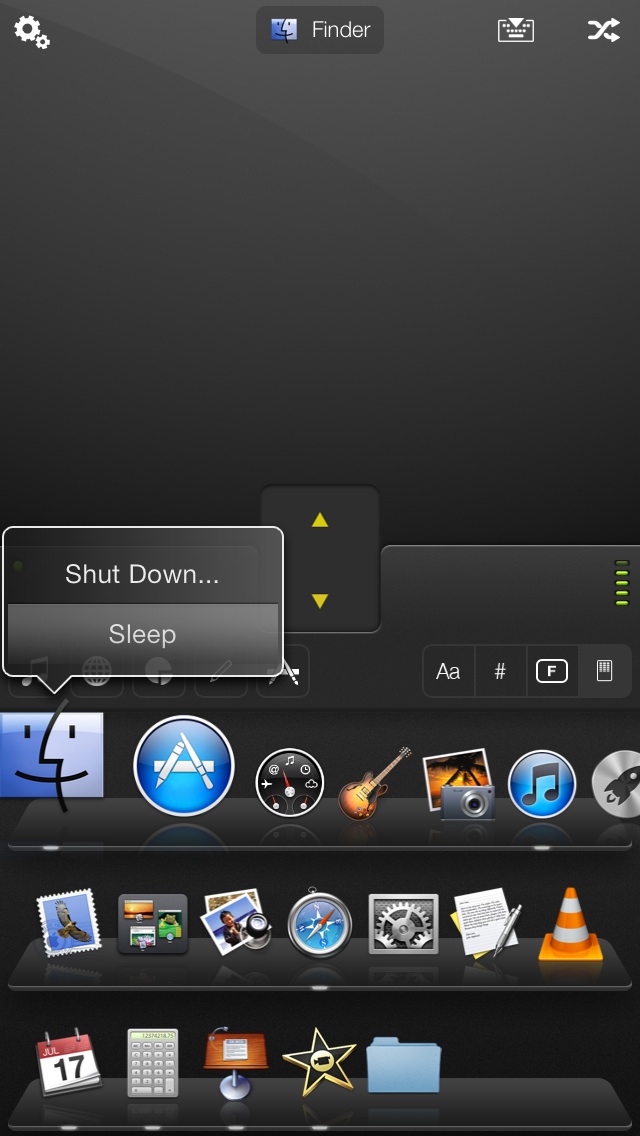
The application switcher offers you a way to launch any of your favorite programs, as well as switch between all your running applications and perform different actions on any of them. If you are on a Mac, all the icons on your Dock will appear. On Windows XP/Vista, you will see all your running programs as well as your Quick Launch items. If you are running Windows 7, you will also see any programs that are pinned to the taskbar. Run your finger over the icons to see the full size icon and application title on the screen as well as on your computer screen. To switch to or run an application, simply tap the icon. If you hold your finger on an icon for a couple seconds, you will get a popup menu to Close/Hide a running application, or Open a program which isn't running. Keeping your finger down, just drag your finger over the menu to select the option you want. If you hold your finger on the OS icon (the first icon in the upper left hand corner), you will be given the option to shutdown the computer or put it to sleep. |
||||
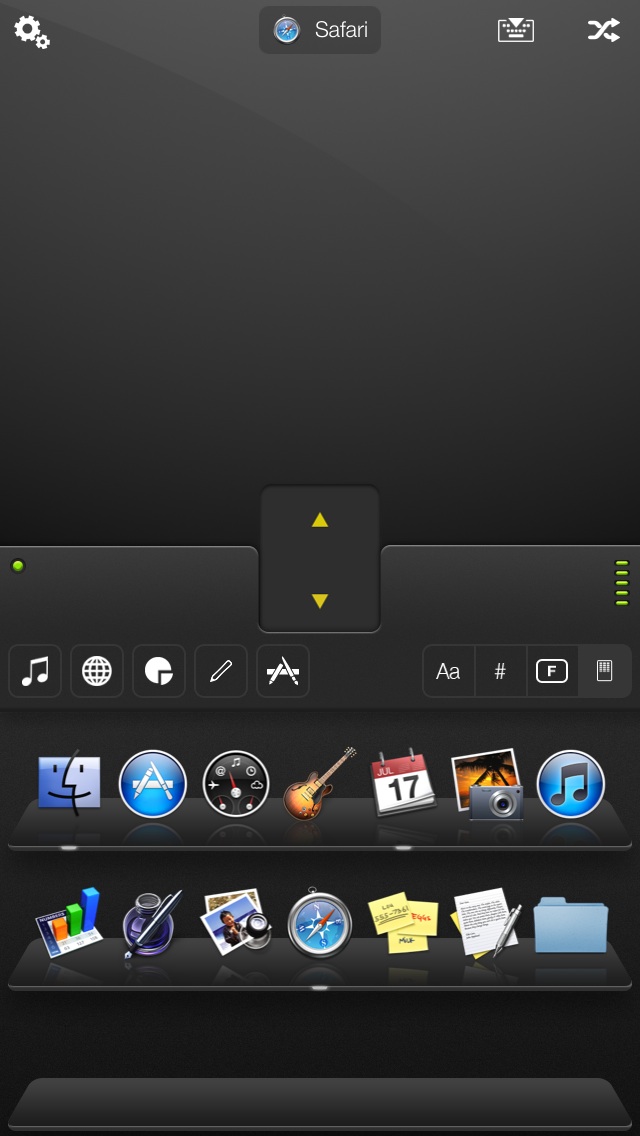
| File Browser | ||||
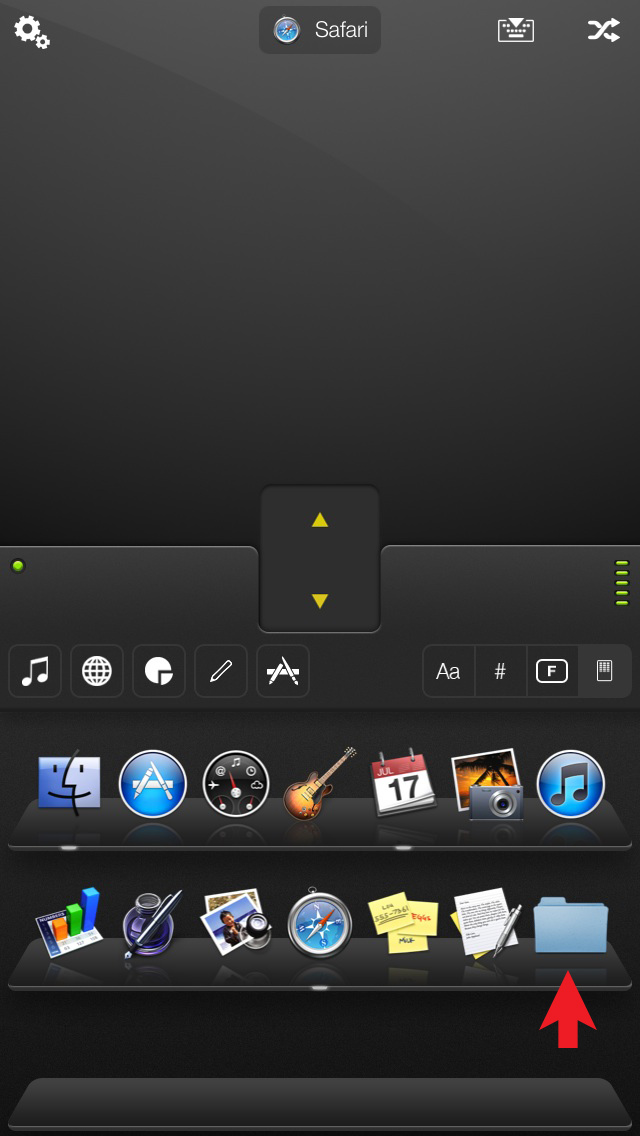
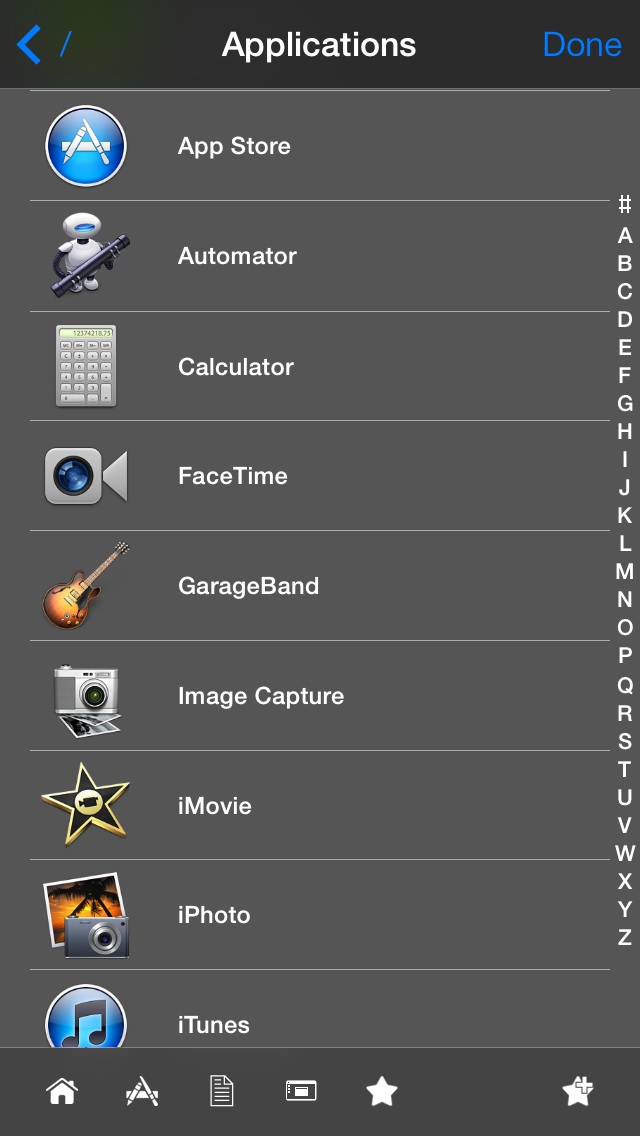 The file browser allows you to browse your computer's file system, run applications, and open documents. The file browser is available by tapping the folder icon in the application switcher screen. Click here to view a demo of the file browser. |
||||
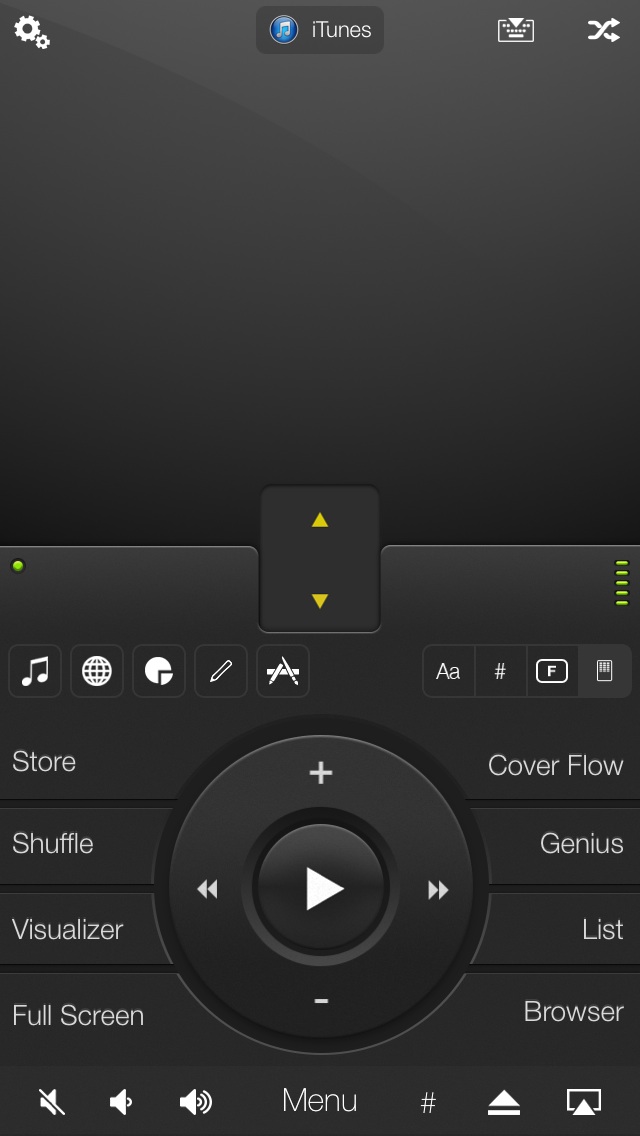
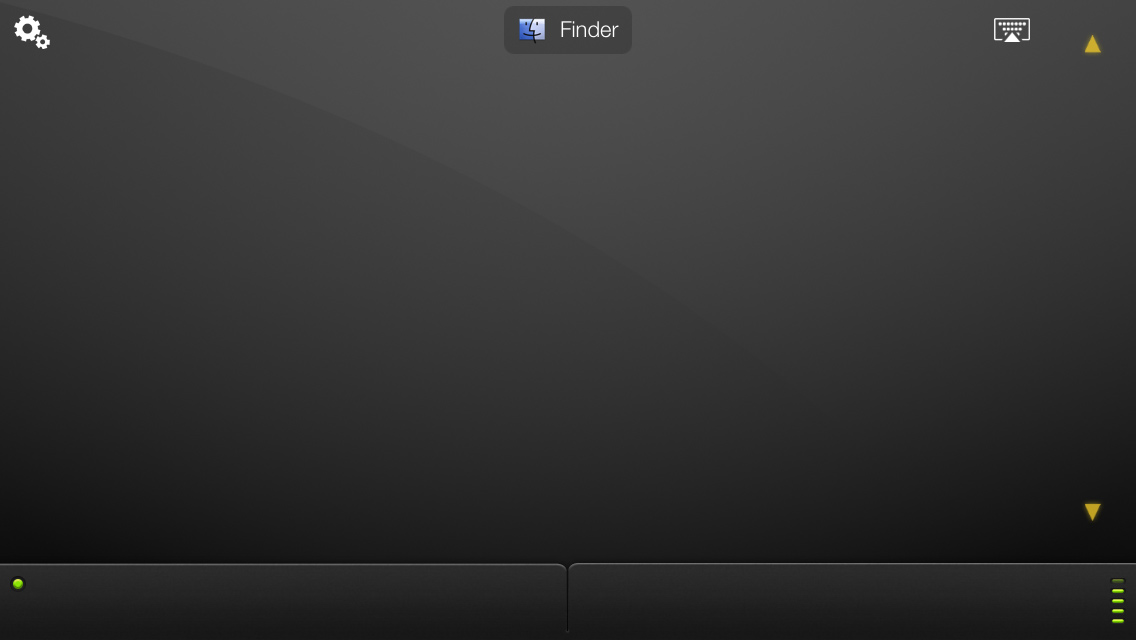
| Media Mode | ||||
The media keys screen contains all the most common buttons that you will need to control all your media apps. The middle button is used to play/pause your media tracks. On either side is a Back and Next button, for going to the next or previous tracks. If you double tap the Next/Back buttons they will be used to Forward or Rewind your media. Above and below the play/pause button is the +/- buttons, which are typically used to change channels, or to adjust the volume of the application. On the left and right of the screen are 8 custom buttons. The functionality of these buttons will change based on the program you use, or may not have any functionality for certain programs. Along the bottom are buttons for volume up/down and mute. These control the volume of the system, not the application. In the middle is a Menu button, which has many purposes that vary depending on what program you are running. On the right is a # button, which brings up a numeric keyboard that is most commonly used to change channels. The eject button ejects any media currently in your drive. The AirPlay icon let's you change the output of your audio on your computer as well route it to any AirPlay device. It will also let you mirror your diplay over AirPlay if your version of OS X supports AirPlay mirroring and you have an AirPlay device that supports AirPlay video, such as an AppleTV. The media screen will automatically come up anytime you are using a media program that has itself set up in the server settings. Additionally, you can quickly switch back to the last most recently run media program by pressing the music note button on the toolbar. This button will only activate a media program if you were already running one, it will not launch your media programs. The image on the right shows our universal volume control. This allows you to access the volume even when the media screen is not showing. To activate it, just press and hold your finger down on the music note icon on the toolbar. Once you see the volume popup appear, release your finger and tap the volume icons to change the volume levels. The menu will automatically hide once you stop tapping the volume icons. |
||||
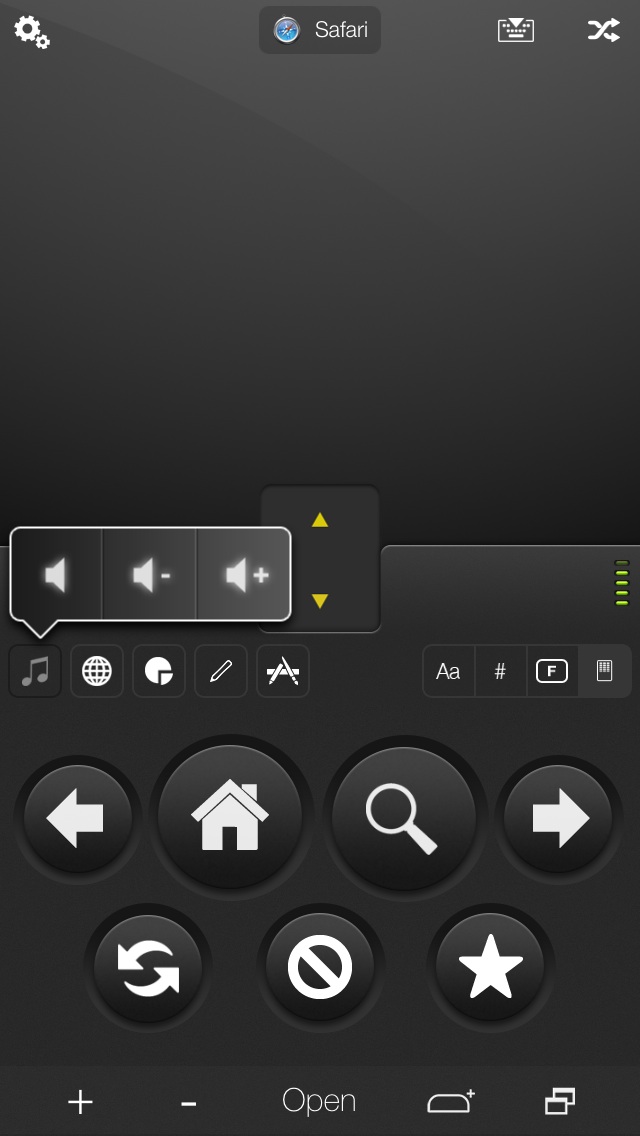
| Web Mode | ||||
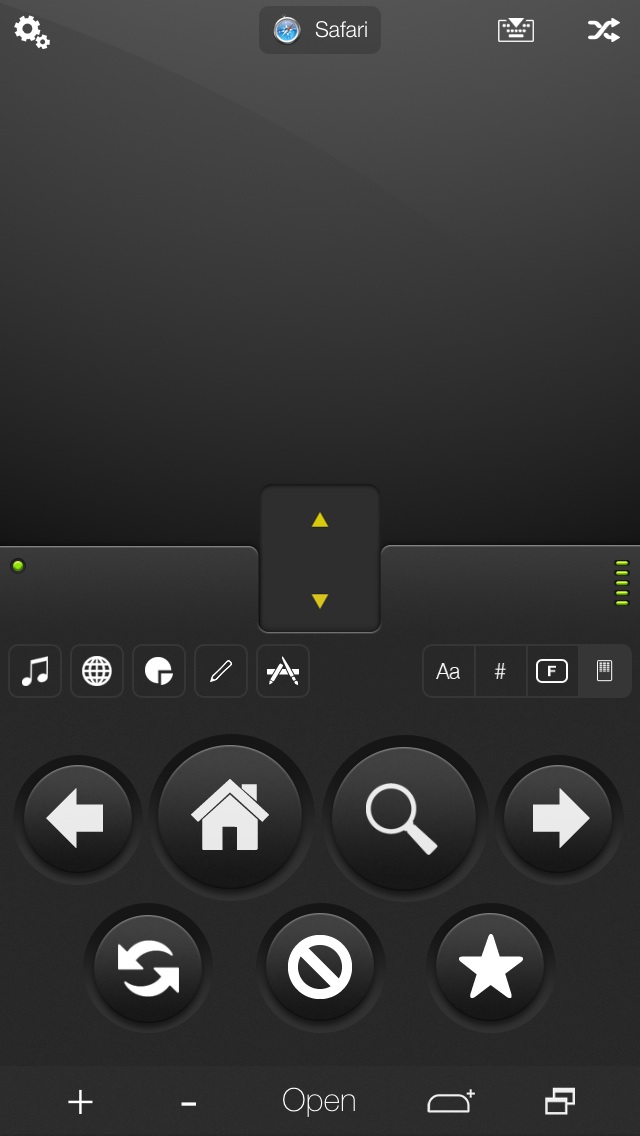 The web keys screen contains all the most common buttons to control all your web browsers. The top row of buttons contain Back, Search, Home and Next buttons. The second row of buttons contain Reload, Stop, Bookmarks. Along the buttom of this screen are +/- buttons, which most commonly act as the zoom in/out buttons. In the center is the Open button, which will set the focus to the Location field on your browser and bring up a URL keyboard on your iPhone. |
||||
| Presentation Mode - Basic | ||||
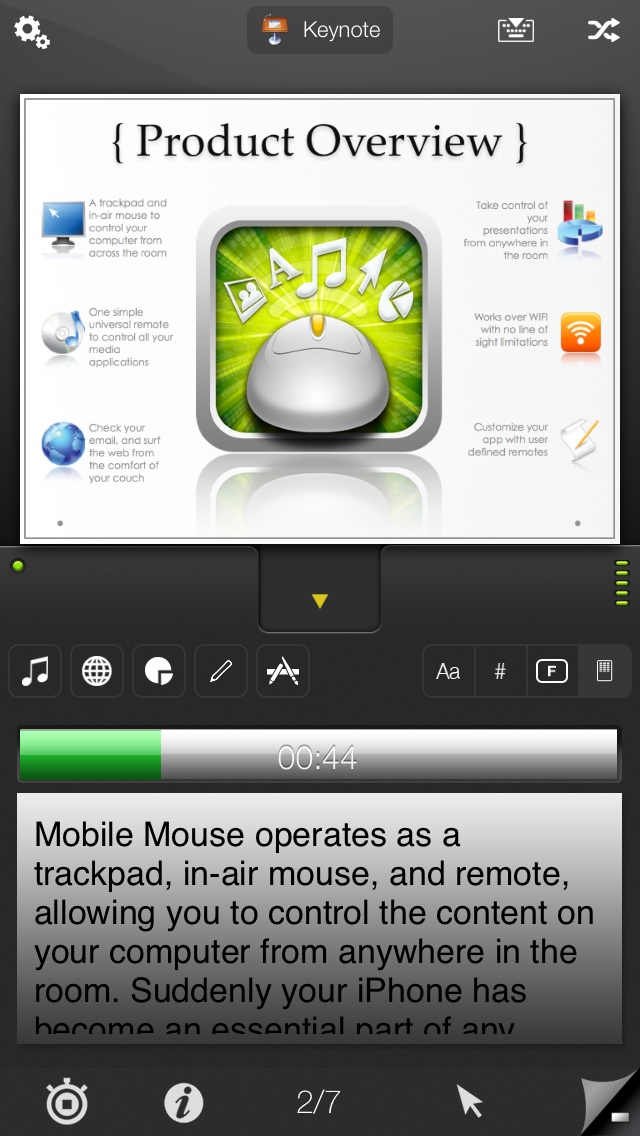
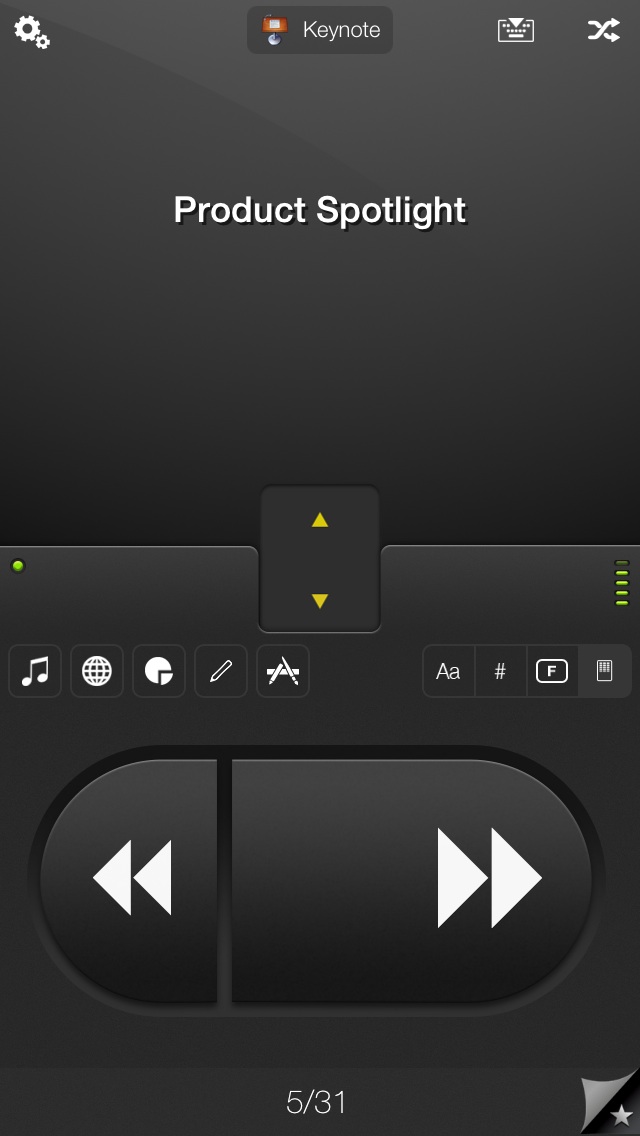 The basic presentation mode contains oversized next and back buttons along with a Start button on the bottom, making it easy to navigate your slide show without needing to look down at your iPhone. While your slide show is running the current slide title will show up on the trackpad. The current slide number will show up on the Start button, which will now stop the slide show when you tap on it. To switch to the pro version of the presentation mode, simply tap the star icon. * The basic presentation mode works with Keynote 09+ (Mac) and Powerpoint 08+ (Mac or PC). |
||||
| Presentation Mode - Pro | ||||
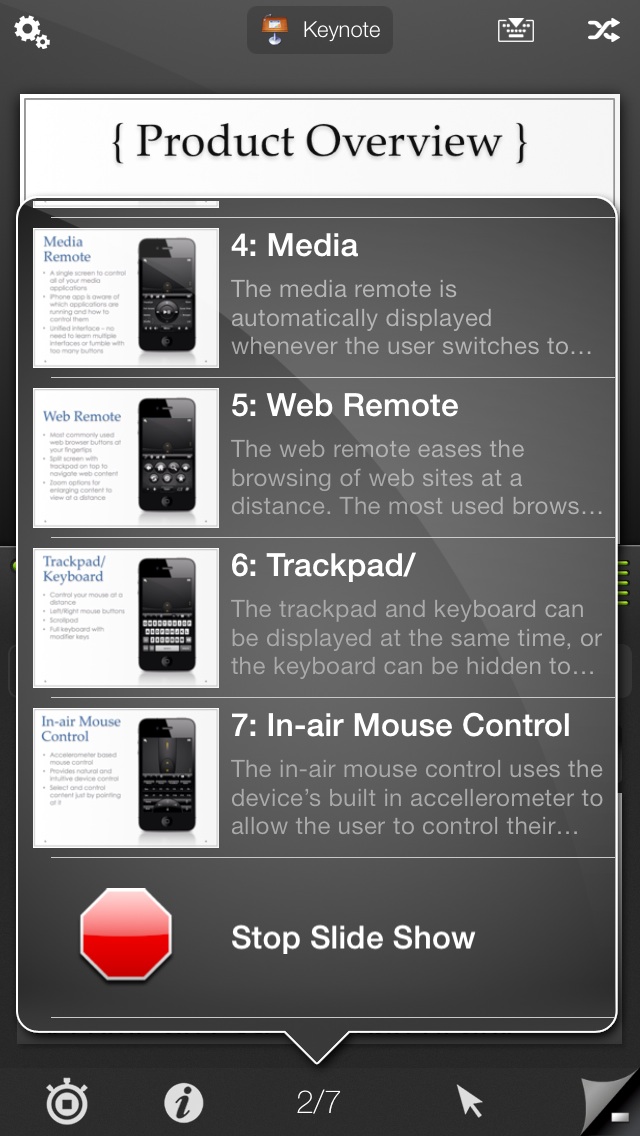
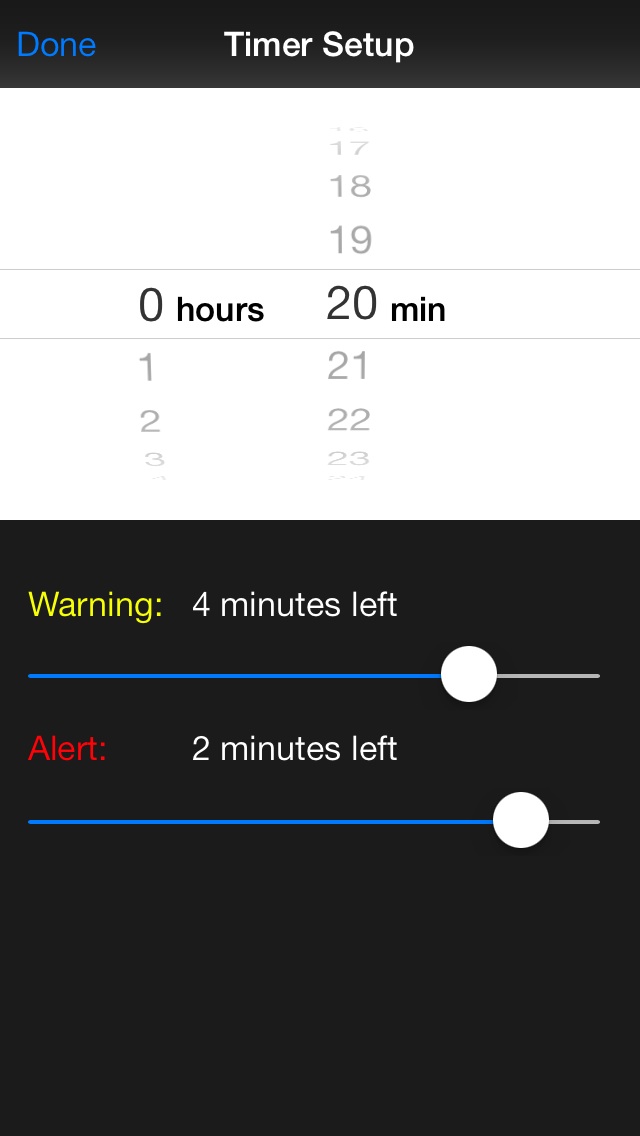
The pro presentation mode will show you an image of the current slide you are viewing on the top portion of the screen. On the bottom you will see the presentation notes of the current slide. Above that is a presentation timer, which will show you how much time you have left in your presentation. As you reach the warning and alert points in your presentation, the timer will turn yellow, then red and will vibrate the iPhone to indicate that you have reached these points. The total presentation time as well as the presentation points can be configured through the timer setup by tapping the "i" icon on the bottom. To start the timer, tap the timer icon on the bottom. To navigate your presentation slide show, simply swipe the presentation slide to the left of right, or tap the slide to move forward. At any point you can hide the current slide by dragging it upward and off the screen. When you do this it will turn into a drawer, which you can slide back down to view the current slide. To navigate to a specific slide, simply tap the button with the slide numbers. This will bring up a slide picker, allowing you to jump to any slide, or stop the slide show. We also feature a slide pointer. To activate this, tap the pointer icon. When this is active, anywhere you tap on the slide in the app will show a pointer on your presentation in the same location. To switch back to the basic version, just tap the "-" icon. Click here to view a demo of the presentation mode. To use the presentation mode you must have "Enable access for assistive devices" is checked in System Preferences->Universal Access. If you are using Keynote, please go under the Slideshow Preferences, then click the Slideshow tab and make sure "Allow Expose, Dashboard and others to use screen" is checked. * The pro presentation mode works with Keynote 09+ (Mac) and Powerpoint 08+ (Mac or PC). |
||||
| Clipboard Sync | ||||
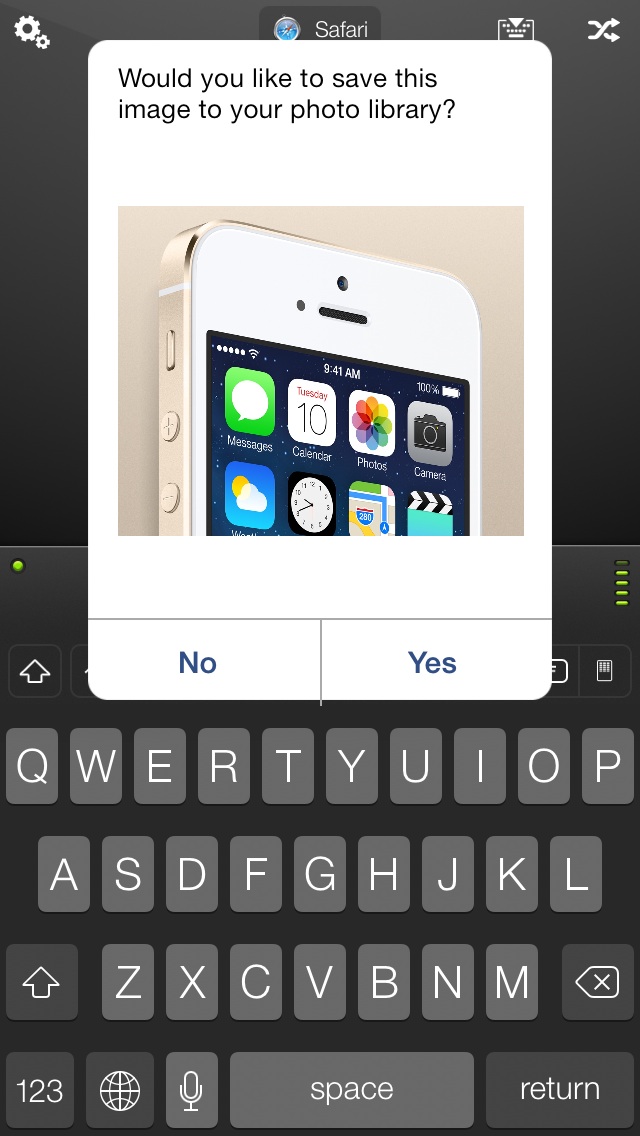
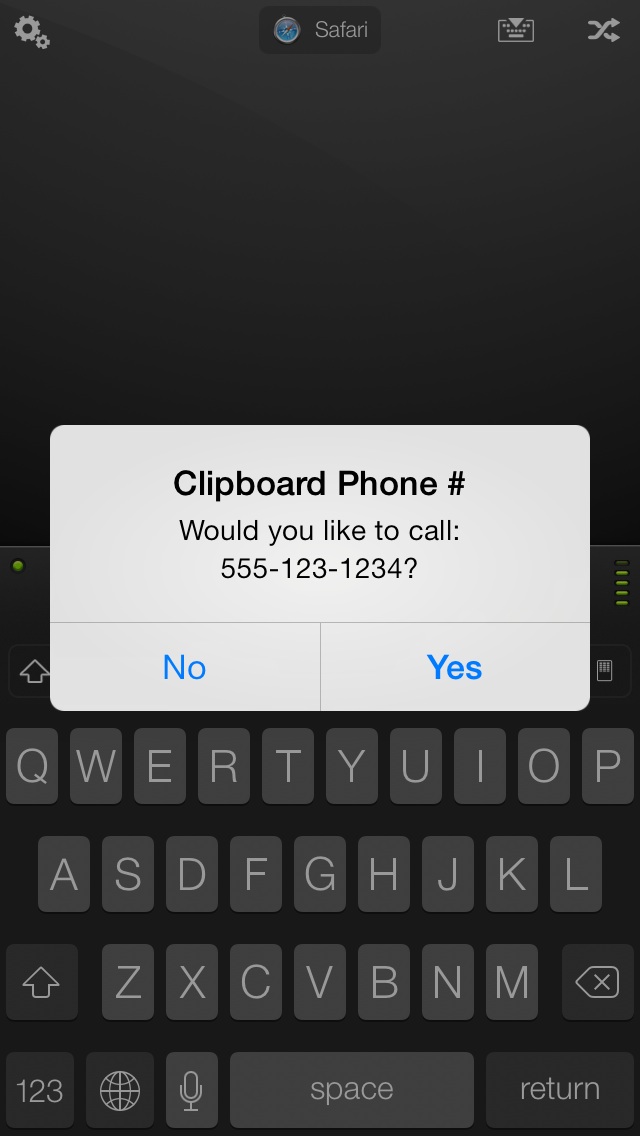
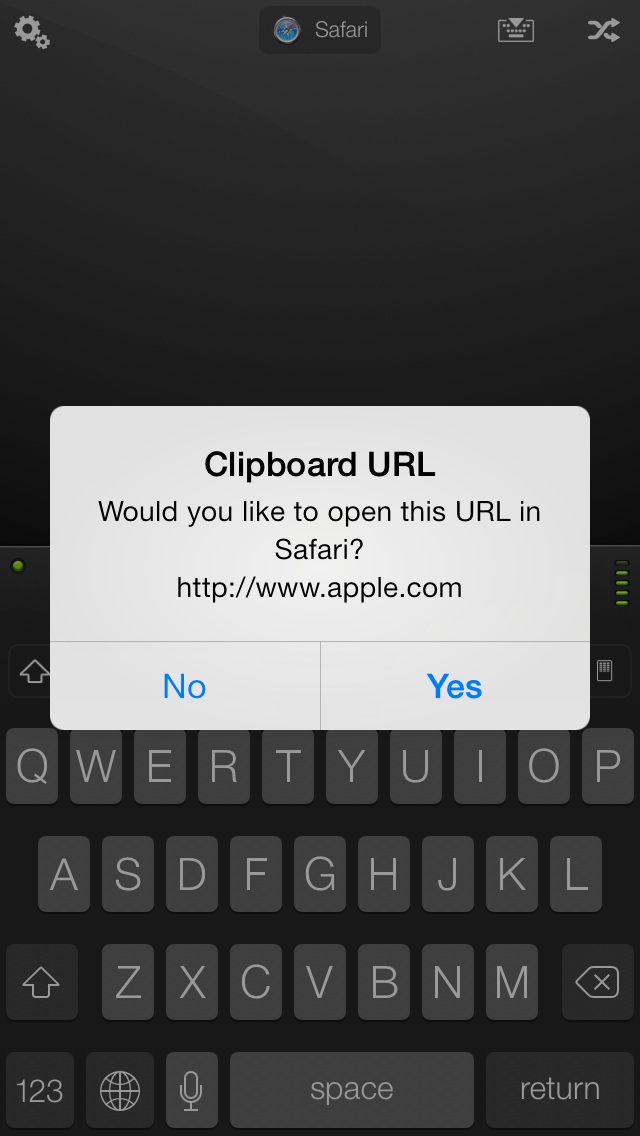
When the clipboard sync option is enabled, the clipboard on your computer will be synced with the clipboard on your device. So every time you cut or copy an item on your computer, it will automatically be in the clipboard of your device. This is great for quickly getting snippets of content from your computer onto your iPhone. Such as if you see a picture in a web browser on your computer and want to quickly text it to a friend. Just copy the image on your computer, and it will be in the clipboard on your device and ready for you to paste into the "Messages" app. Additionally we have added a clipboard notification option as shown above. When enabled it will alert you when it recognizes the type of content in your clipboard. Such as if you copy a phone number on your computer, it will ask you if you want to dial it on your iPhone. It will also recognize addresses, images and URLs. Click here to view a demo of the clipboard sync option. |
||||
| Function Keys | ||||
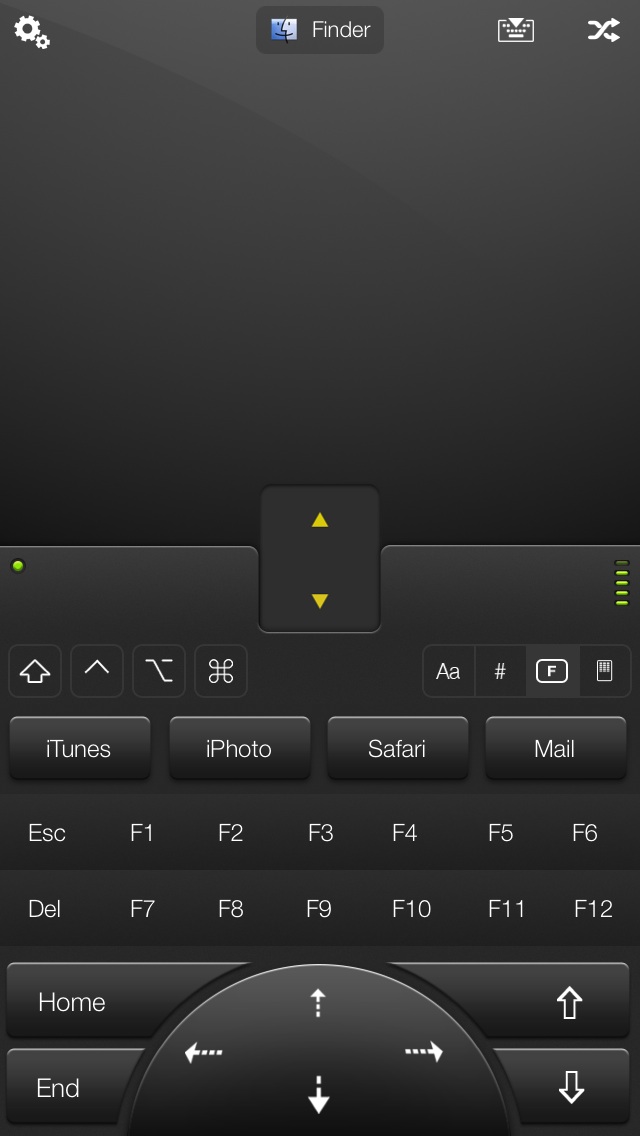 The function key screen contains all the function keys you would find on your regular desktop keyboard as well as an Escape key, Delete, Home, End, Page Up, Page Down and arrow keys. These keys also respond to the modifier keys. Above the function keys are 4 customizable hot keys. These are set up in the server settings by clicking the Function button. They can be named and assigned to run a program or perform a keyboard shortcut. In addition to the 4 hot keys, the scroll pad is also a programmable hot key, which can be configured in the Function screen too. |
||||
| Numeric Keypad | ||||
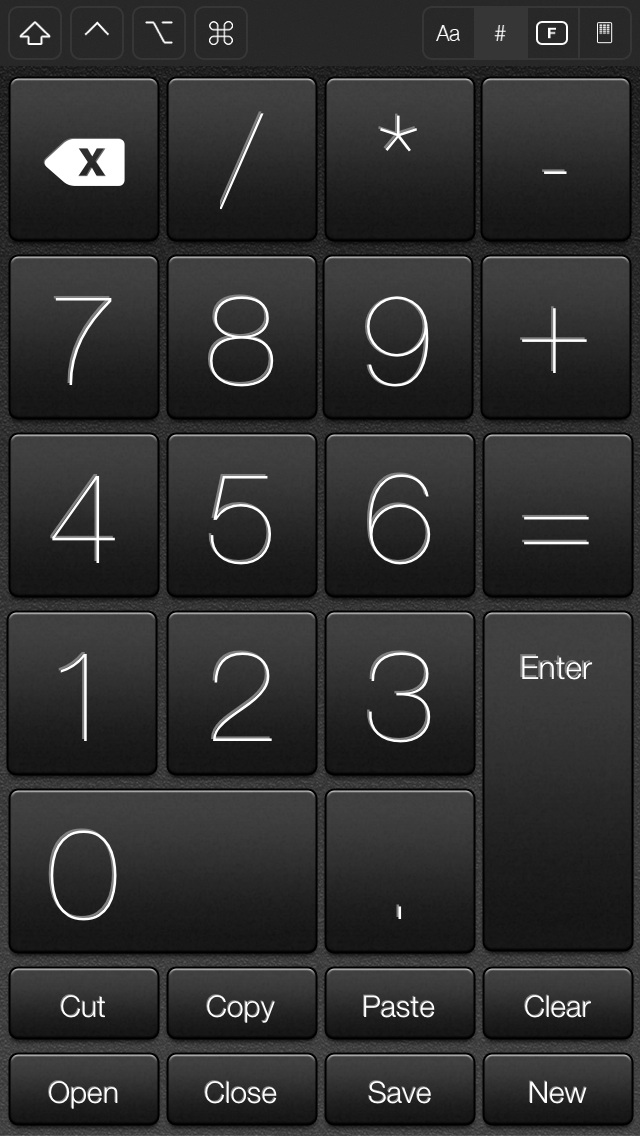
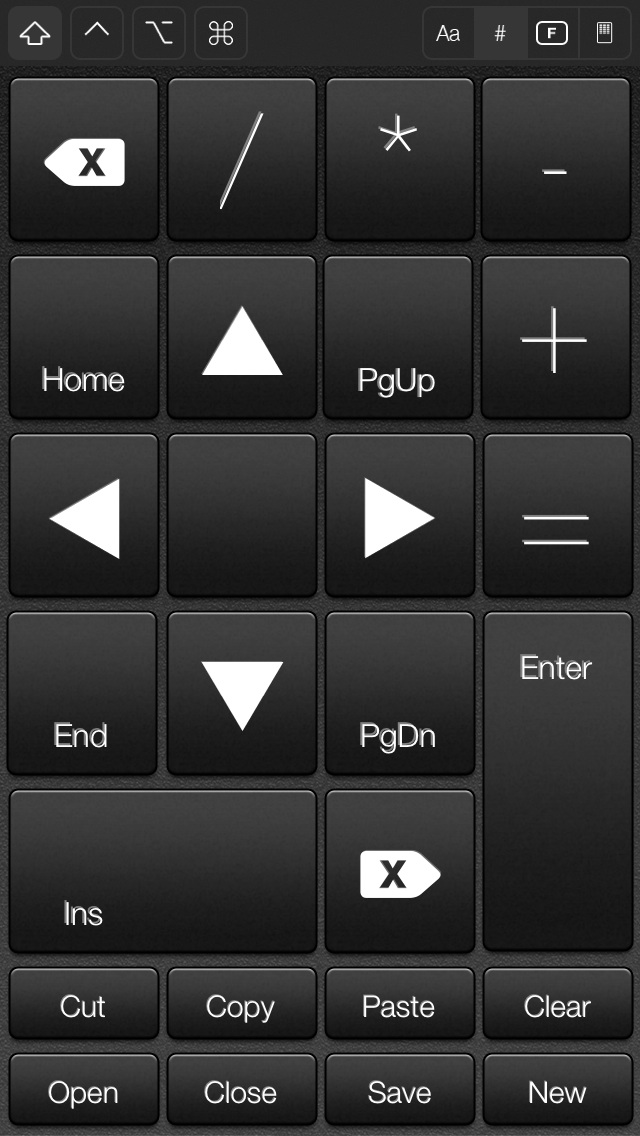
The numeric keypad contains all the keys your would find on the numeric keypad on your desktop keyboard. If you press the shift key, you will get a modified keypad with the arrow keys. |
||||
| Camera Input Mode | ||||
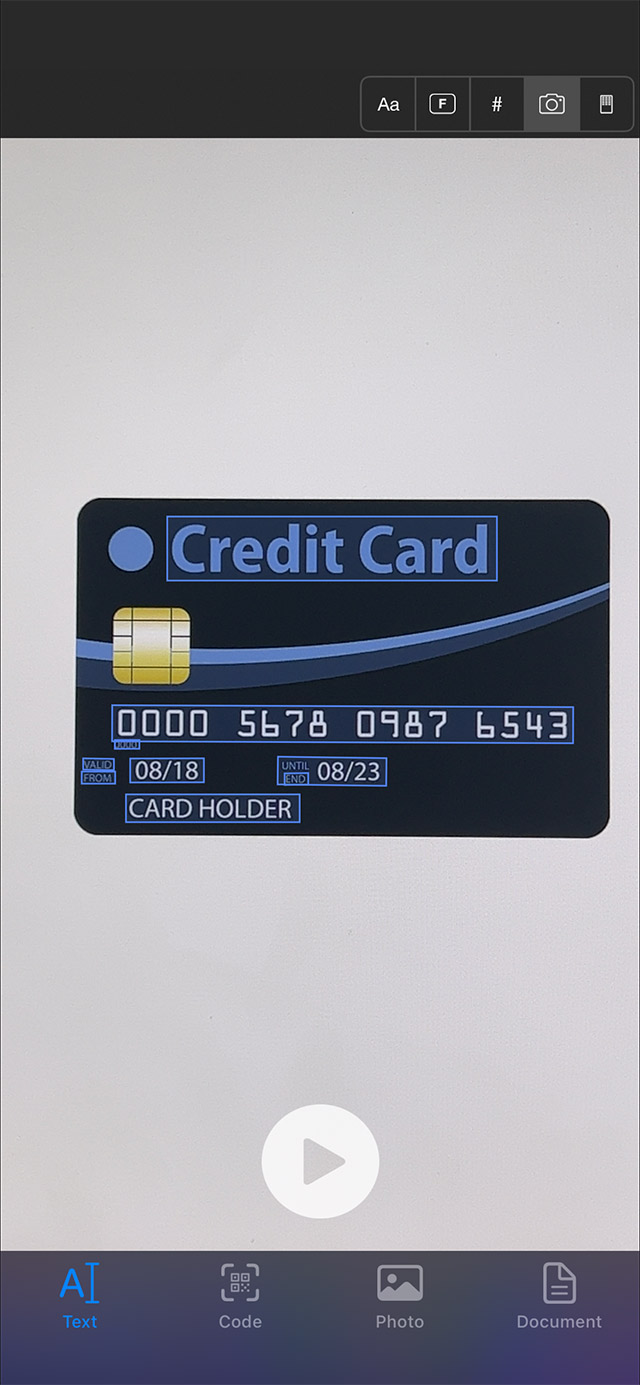
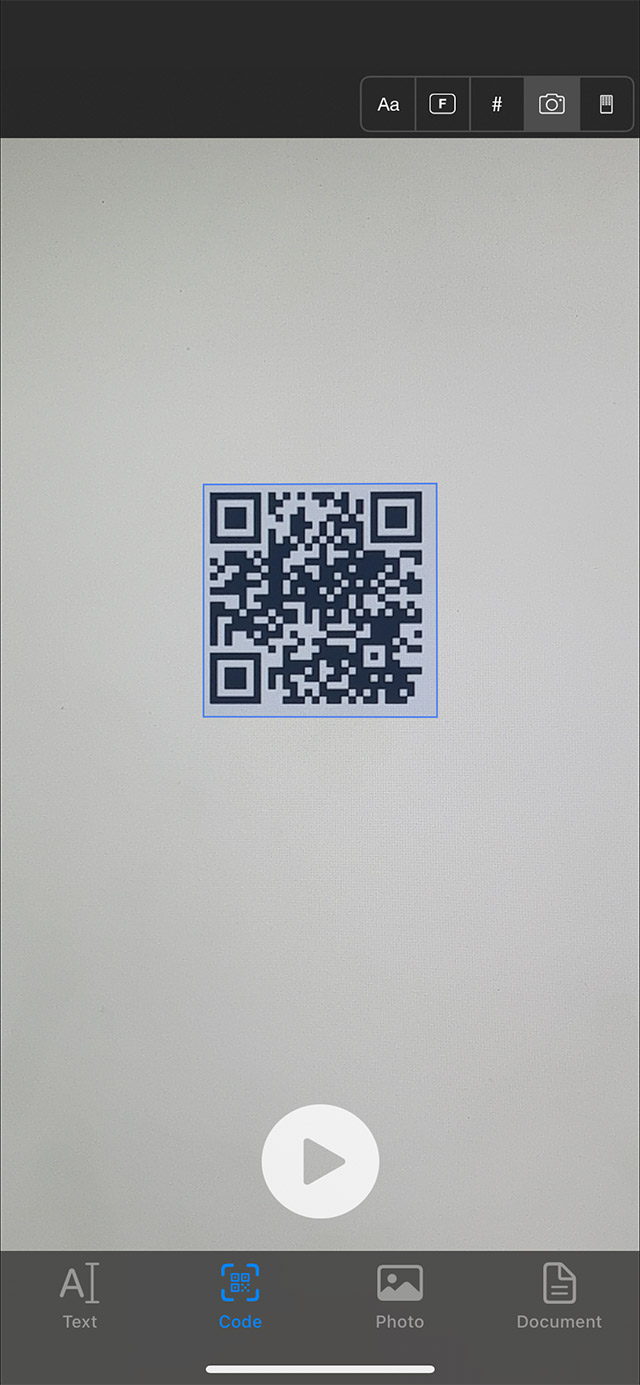
The camera input lets you input text, QR/UPC codes, photos and documents on your computer in any app you are currently using. Text mode: Point your camera at any item that has text that you want to enter on your computer and you will see blue boxes outline each piece of text. Simply tap each box that you want to type on your computer. The pause button will freeze the image, making it easier to tap the boxes Code mode: This mode can scan any QR or UPC code and enter the text from that code on your computer, wherever your cursor currently is placed. Simply point your camera at any QR or UPC code and tap the blue box around the code. Photo mode: The photo mode will let you capture photos from your camera or photo library. Once you take a photo it will be instantly sent to the app you are currently using on your computer. For instance, if you are typing an email and want to include a photo, simply take the photo and it will appear in your email where your cursor is. You can also select a photo from your photo library. If you wish to send the photo to your computer instead of inserting it in place, make sure you are in your Desktop and not an application, and the image will be stored in your Downloads folder. Document mode: The document mode will automatically recognize, scan, and straighten multiple pages of documents and send them to your computer as a series of images, or type the contents of the text to any application you are currently using. Like the photo mode, if you are in the Desktop the images will be stored in your Downloads folder. |
||||
| Graphic Tablet | ||||
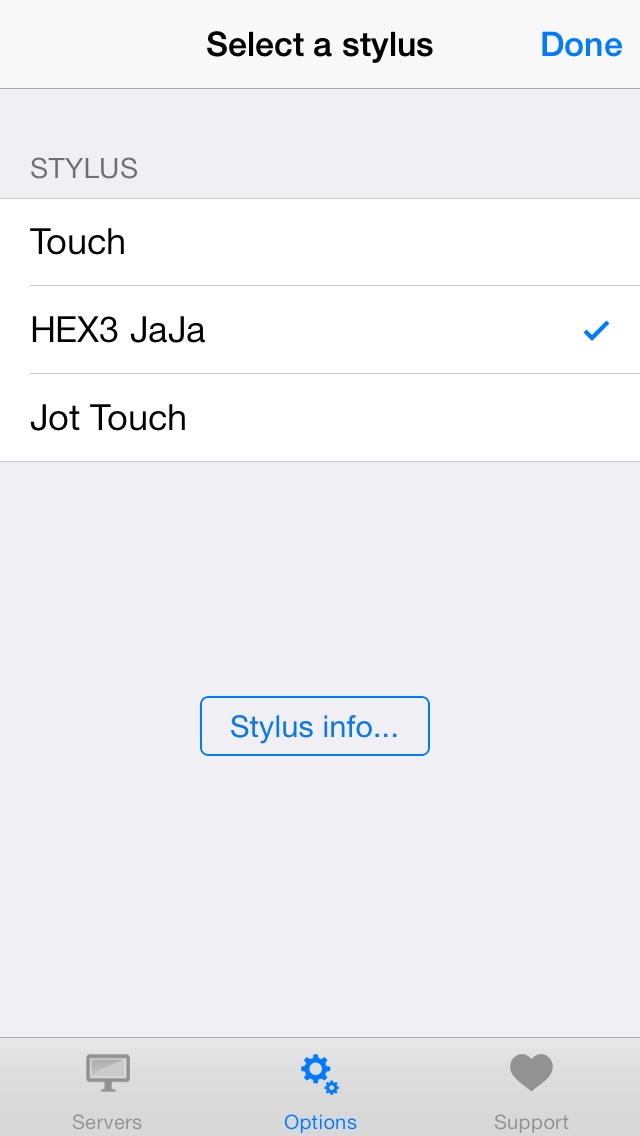
The graphics tablet allows you to use your iOS device as a graphics tablet for your computer. To select your stylus, go to the app settings, then to Options, scroll down to the Tablet options and tap the button labeled Stylus. Selecting the Touch stylus will allow you to use your finger or any non-pressure sensitive stylus. The stylus options below "Touch" are pressure sensitive ones that are supported by Mobile Mouse. Currently pressure sensitivity is only supported on OS X. After you select your stylus of choice, the selected stylus logo will show up in the tablet screen next to the status light. The status light will turn green if your stylus was able to connect to the app. Once you load the tablet screen, a light blue box will appear on your computer screen. This workspace corresponds to the one on your iOS device and will match the orientation of your device. If you want to resize the workspace just pinch the screen to grow/shrink the workspace on your computer. To emulate the hover feature found in most traditional graphic tablets, the app will treat any activity that is below a minimum pressure amount as mouse movement. Once you press hard enough where the pressure value exceeds the minimum pressure amount, the tablet will start drawing and responding to the pressure values. Depending on your stylus brand and how it has been calibrated this value may need to be adjusted to your needs. This can be down by adjusting the “Min Pressure” slider in the Tablet options. |
||||
| App Settings | ||||

|
||||
| Wake On Lan | ||||
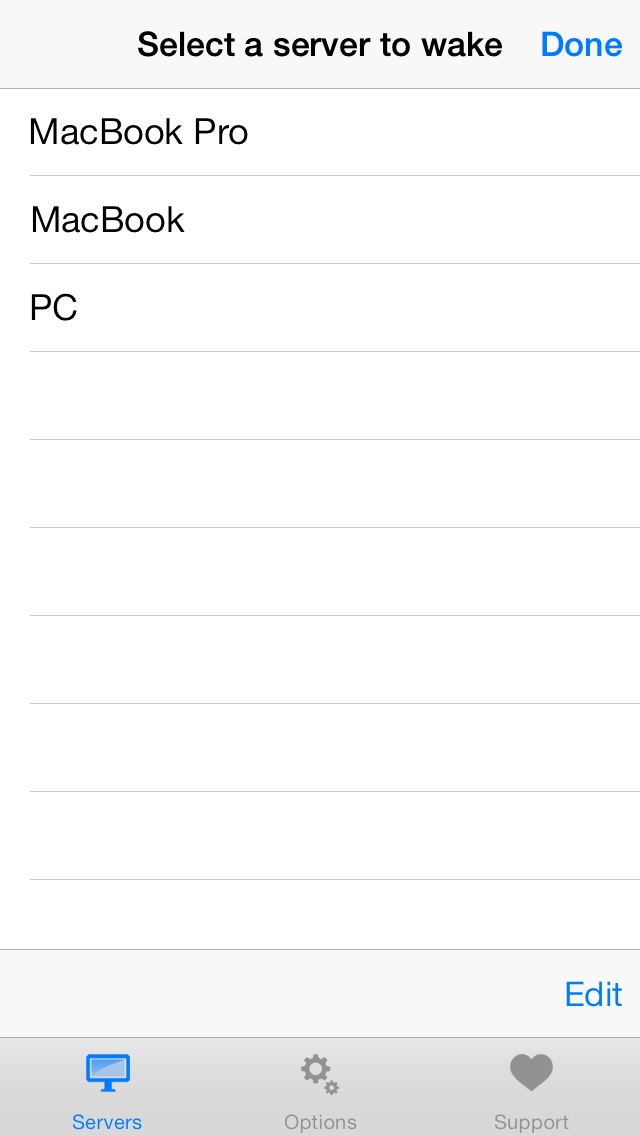 When you first connect to your computer, if the computer is sleeping, the app will attempt to wake it. However if it was unable to wake it, or you want to wake a different computer, press the power icon in the upper left hand screen of the app preference. A list of all the servers that you have connected to will come up and you can select which server you want to attempt to wake. Please note that wake on lan requires that your computer be connected to your router using an ethernet cable. Many computers may require additional setup to support wake on lan. Our app simply sends a wake on lan packet to your computer, if your computer does not wake up, you will need to troubleshoot this on your own since this has to do with the configuration of your computer. |
||||
| Advanced Communication Package | ||||
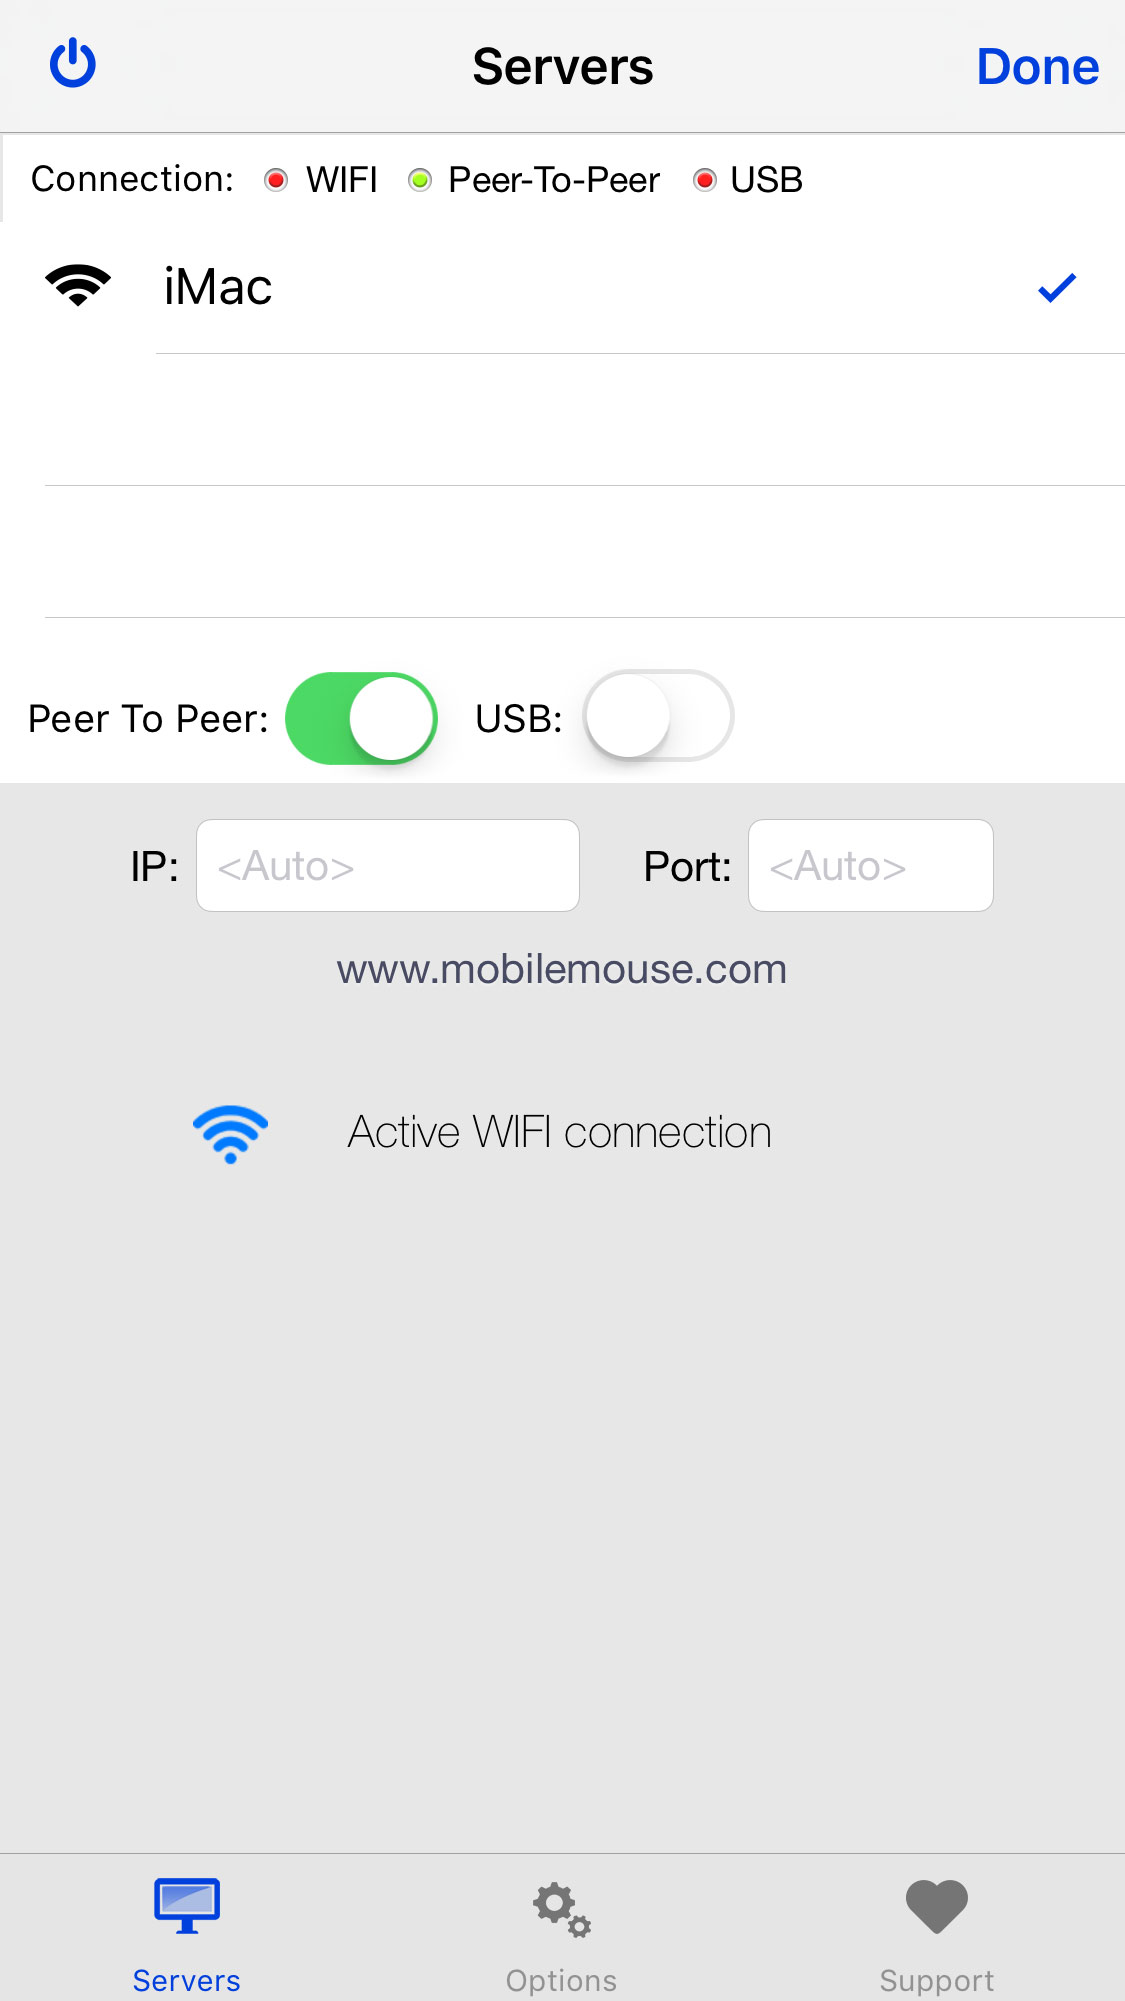
Peer To Peer: This option uses a combination of Bluetooth and WIFI direct to communicate with your computer. The option must be enabled in the server settings as well as the app settings, and you must also have WIFI and Bluetooth enabled on your iOS device and Mac. Once you enable it, you will should see you computer listed in the server settings. If the mouse tracking is choppy after connecting, please check the server settings and make sure the status light next to Peer-To-Peer is green. If it is yellow, try connecting again. You must be using iOS 7+, OS X 10.10+, and a Mac that supports WIFI Direct and Bluetooth LE. When you click to enable the Peer To Peer option the server will tell you if your computer is not supported. USB: This option will connect over a standard USB cable. The option must be enabled in the server settings as well as the app settings. Once it is enabled, the app will connect over USB anytime your iOS device is connected to your computer using a USB cable. To retry the connection, tap the reload button next to the USB button. |
| Menu |
|---|

The Apple watch App offers four options of control. A Mouse Trackpad, a Media Remote, a Presentation Remote, and an App Switcher. The title at the top of the screen shows the name of the computer that the app is connected to. The Watch app will automatically connect to the last server that the Mobile Mouse app has connected to. If it is unable to connect you will see an error message with an option to try again. The settings screen will list all the computers you have connected to before on your iPhone, as well as give you the option to manually add a server, and swipe left to delete a server from the list. |
| Media |
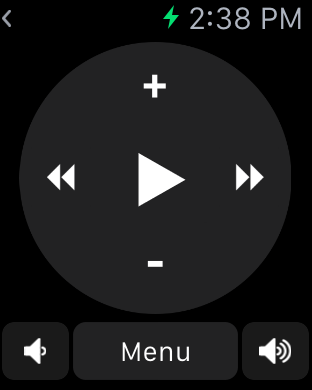
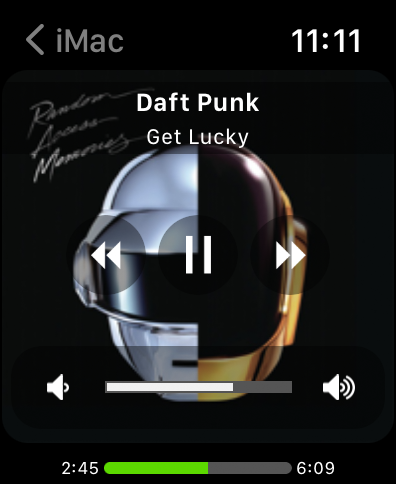
The media remote allows you to control the frontmost media player on your computer. If you are running a media player that has been setup in the server settings, the basic remote will allow you to play/pause/forward/reverse, and control the volume of the computer. If you are running a Spotify or iTunes you will also see the almbum art and info. Use the crown of your watch to change the volume on your computer. |
| Trackpad Mouse |
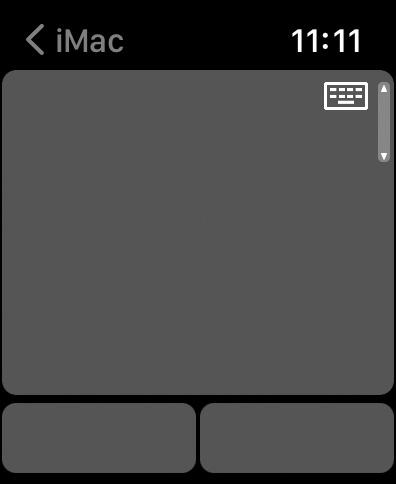
The trackpad offers you the ability to control your computer mouse from your Apple Watch. It works just like the mouse in the app, with the exception of multi-touch gestures. Below the trackpad are the left and right mouse buttons. The digital crown can be used to scroll. |
| Presentation |
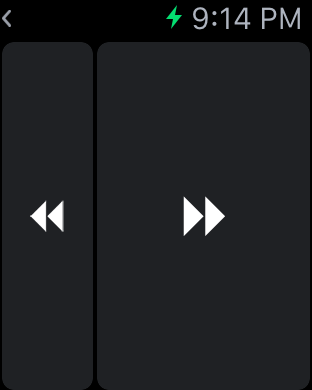
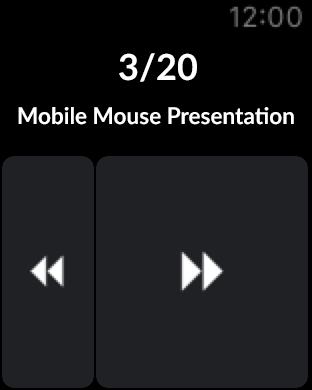
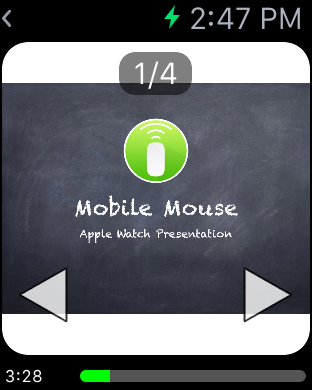
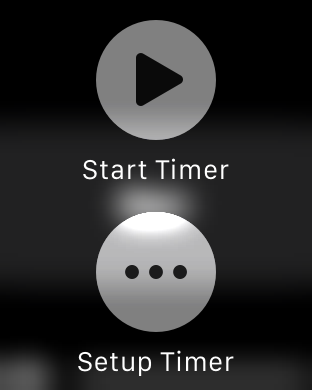
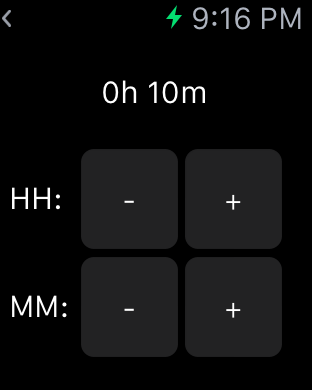
There are three presentation remotes. For presentation programs that are not supported by Mobile Mouse, the first remote provides simple next/back buttons that will work with any software that uses the arrow keys, even online presentation programs like Prezi. If you are using a supported program, such as Keynote or PowerPoint, you have the option to use the basic remote or pro version (available as an in-app purchase in Mobile Mouse). The basic remote offers next/back buttons as well as the slide number and slide title. If you have purchased the pro version, you will alse see a picture of the slide itself and a presentation timer. Use force touch to start/stop or configure the presentation timer. |
| App Switcher |
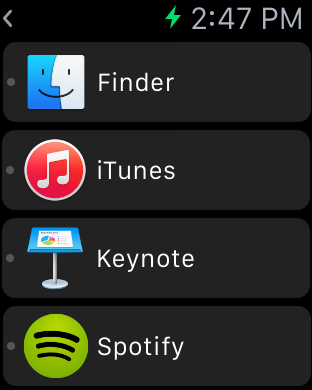
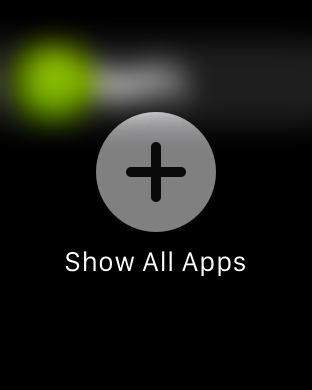
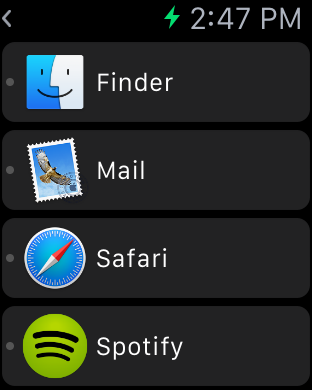
The App Switcher allows you to switch between any currently running app on your computer. This is useful for bringing your desired media program to the foreground so you can control it. Use a force touch to bring up the option to toggle between showing all apps or just managed apps. Managed apps are only ones that have remotes built for them. |
| Troubleshooting |
|---|
|
We have listed all the most common problems users are encountering. Please check every step very carefully, because the majority of problems that users contact us about can be resolved by one of the steps below. If you have gone through all these steps and are still having problems, please contact us immediately and we would be happy to help you get it working. We see many people posting their questions and problems in the iTunes review section. Unfortunately there is no way for us or anyone else to respond to your questions there, so please contact us directly.
|
| FAQ |
|---|
|